0

peachy bruschetta appetizers

Today I want to share my simple recipe for mini bruschettas. These things are super easy and each part of the bruschetta can be prepared the day before serving if one wants to, yay! Plus, these little creations are delicious!

peach

For about twenty mini bruschettas you’ll need

  • one baguette
  • a goat cheese you like
  • four or five peaches
  • butter
  • brown sugar
  • honey

The day before I served these I prepared my peaches! I sliced my peaches into small wedges, then I fried them in a pan with a generous amount of butter and brown sugar. If your peaches are really, really sweet you can skip the sugar, but I find that it goes well with the buttery taste. Be quite cautious while frying them, they easily stick to the pan! When they’re done, let them cool and then put them in a box in the fridge.

The next day you buy a fresh baguette and slice it into half-inch pieces. Then add them to a pan with a small amount of butter, you don’t want to soak them. Heat them up so they look all grilled and nice. If you’re not serving immediately, let them cool and store in an airtight plastic bag until you are.

When it’s time to serve you take one slice of the goat cheese and top each slice of bread, then add two wedges of your fried peaches. Then, as the best part of it all, drizzle some honey over each bruschetta! It really makes it all come together. Serve and watch as the plate quickly empties!

peach2

0

vintage plate revival

As you might recall I’m into plates with animals on them at the moment. I kind off collect them, but they’re hard to find! So I made my own cat plate. Today I’m showing you something similar, this time two vintage plates get a whole new style!

I adore vintage plates, especially the ones with flowers on the edges, too pretty. Not to mention the gold lining that often occurs as well! I just love them. Sadly they rarely come in dinner sets, some plates broken through the years. They’re often sold alone or in pairs. I know a lot of people want matching dinner sets, but I’m not that picky! Mix and max is just as good, and much more personal. So when I found these two plates in the thrift store I had to get them (plates like these cost almost nothing at all). Then I thought I had to give them a make over to make them more interesting.

I thought a good long while about what i could paint on them to match the flowers. Then I thought of it! Bees! They like flowers, could be counted in the ‘animal’ category and they are super cute!

beeplate2

This is what you’ll need

  • vintage flower plates
  • gold sharpie (or any other water-resistant sharpie you might prefer)
  • rubbing alcohol (to clean the plate)
  • an oven

First of all, find you plates. Any flower plate will do, choose the ones you find the prettiest. In any thrift store you will find loads, I promise! They do not have to match, as mine do though.

beeplate6

beeplate7

Use the rubbing alcohol to clean your plate, finger prints and oil from you hands could disturb the sharpie pen from staying put. Just wipe it off a bit. Then take you pen and try it on a piece of paper first. This is important if you using the gold kind, they tend to ‘flow’ a bit more then the usual black sharpie pen. I found it much easier to paint the actual plate after making some sketches.

beeplate8

Start making you design! I had three bees on one and two on the other, but if you want you could try to make them symmetrical. When your pleased with the design and the bees are enjoying the florals it’s time to bake the plates. Set the oven to 175 degrees celsius (350 degrees Fahrenheit) and bake them for half an hour. Let them cool. And your done! Easy, right?

beeplate

beeplate4

beeplate5

Bee safe! (Yeah pun intended) xo Pella

0

the worlds easiest berry cake

Just like the title implies this is THE easiest cake you could ever make. i have not done a tutorial for this, since it so easy any way.

birthdaycake

This is all you need

  • Store bought or home-made sponge cake (I did not bake mine myself, that would spoil the ‘easy’ part)
  • Whipped cream
  • Lemon curd
  • Loads of fresh berries
  • Nuts (I used almonds)
  • A can of sprite

Start by pouring some sprite on each of the sponge cakes, I used five layers in my cake. The sprite helps the sponge cake to become more moist and less dry. Then whip you cream, I used almost three cups (7,5 dl) put some in a separate bowl, this later goes on the top! Mix the rest of the cream with lemon curd to taste. I had quite a lot, I’m a sucker for that stuff! Start layering your lemon curd mix on the sponge cake, throw your favorite berries (mine are blueberries and raspberries) and nuts in there, repeat. It’s just three easy steps really! Pour sprite, layer on cream and another sponge cake, easy peasy.  When the cake is as high as you want it, top it off with some regular whipped cream and arrange some berries. Done!

This is a great cake to make a day ahead, it only gets better if it’s allowed to set over night!

birthdaycake3I am SO impressed that this little (enormous) piece of cake could stand, almost more exiting than the actual cake!

9

diy asos knock off embroidered flower dress


asosdress15

In my first entry I wrote about one of my biggest passions, dresses! I can’t get enough of them! I wouldn’t say I have too many, because you can’t really have too many dresses, but I have a few. Most of my dresses are vintage finds or thrifted. I’m not the kind of girl who go for design pieces, I couldn’t afford it and I believe you can dress great without spending too much money! This is where this tutorial get’s in the picture. If you haven’t read my first entry about the dress off my dreams from asos, do it here.

So I was in an impossible position, the dress I had my eyes on was way to pricey and when it came on sale it still was too much for my student budget to bare. And then it got sold out. What do you do? You do it yourself! It was a little tricky but I would like to think that my version, all though MUCH cheaper, is just as good as the one from asos.

Since my dress was too white for my taste I used tea to dye it a more antique white shade. Here is a tutorial for that. But let’s skip to how I turned my plain dress into a wonder of flower power! It was more work than I expected, but I had some fantastic assistance from my mother who is way more handy with a needle and thread then I’ll ever be!

This is what you’ll need for this project

  • a simple dress to your liking
  • lots of iron on flowers
  • lots of sew on flowers
  • needles and thread
  • an iron

asosdress

The flowers I bought I bought on ebay, herehere and here. If I were to buy all the flowers in a craft or sewing store I could just as well’ve bought the original asos dress, they’re that expensive, so i recommend shopping from ebay for this purpose. I think I had about 150 flowers all in all, but some are large and some are tiny, buy as many as you think you’ll need and want. Personally I think more is more (always)!

I started by putting the dress on and trying to figure out where the flowers would be most flattering and look the best together. Since I wanted my dress to be symmetrical, like the asos dress, I put needles in the fabric (while wearing it) to know where I should put the flowers later on. I lay the dress out and started needling the flowers on.

asosdress1

I wanted the lining to be eye-catching so I chose to place the larger flowers there. I saved matching ones for the back.

asosdress4

Only my larger flowers were the iron on kind so they were the only ones I fit into the symmetrical pattern. The small ones had to wait! When I was satisfied with flowers placements I started ironing them on. Remember to take the needle away before placing the iron on the flowers and be very careful with the heat if you dress i lace, like mine.

asosdress5

Ones the flowers are stuck, it can take a while for the glue to set so just keep ironing, it’s time for the tiny flowers. If it was one thing I loved with the asos dress it was that they had sewn flowers on top of each other, so I sewed many of my smaller ones on top of the larger flowers. It takes a good while to sew on all the smaller ones, but don’t give up because the more flowers the more amazing your dress will look.

asosdress6

Before I sewed the smallest flowers on it looked like this!

asosdress22

And this is the finished product, of some weird reason I haven’t got any pictures with me actually wearing it. Next time I throw this beauty on I promise to snap I few pics!

asosdress24

asosdress25


asosdress23

This is how the back turned out, a little bit more bare like I wanted it. My favorite part, except the neckline, is the flowers on the bottom of the dress, the ones that went on the actual skirt. Such a special little detail.

asosdress11

When I wore this I got so many compliments from my friends and I bet you would to if you made your own version!

0

super easy grilled summer veggies

Enjoying the last days of swedish summer I just want to share a really easy way for serving veggies! I am a really big fan of roasted carrots and sweet potato but it feels like it’s been done to many times now. Then I discovered this beautiful way of serving them. This is also a great way of serving at a party, it serves a lot of people and you can make as much as you need.

veggies2

Just pick you favorite veggies, I found some gorgeous zucchini so that was my main ingredient. I added a large sweet potato, some onion and potato. You could easily add tomato, carrots and eggplant. I topped it all off with some fresh spices, I had thyme and basil at hand. Add some olive oil, salt and pepper and put them in a pre-heated oven (200 degrees celsius) for about 40 minuets.

veggies4 

It looks fancy and like you spent more time on it than you actually did! I love clever cooking!

veggies1

Image
3

DIY piñata, party idea

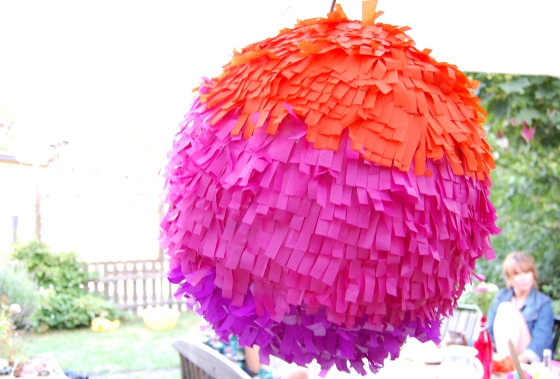
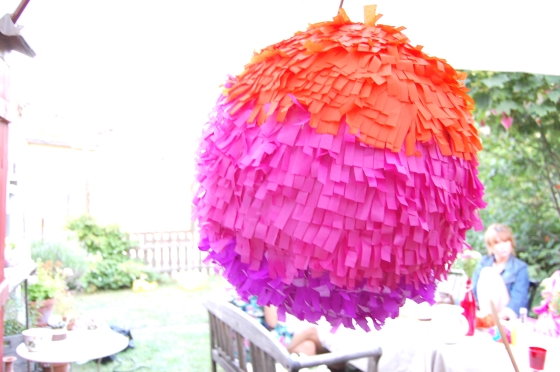
Hi guys! remember the post about my mini pinatas? There I mentioned that I along with the small pinatas also made a really large pinata for my birthday and yes pinatas are for adults as well if you ask me. This is how it turned out and I can say that I was very pleased with the outcome of it all!

pinata16

As I said about the mini pinatas, it’s important to start this craft at least one week before the actual pinata is needed. It takes rather long for the papier maché glue to dry.

This is what you’ll need:

  • one large balloon (mine was gigantic)
  • newspapers
  • papier maché  glue
  • a big bowl
  • glue sticks (for the decorating of the pinata)
  • silk paper
  • string
  • candy (most important part of course)

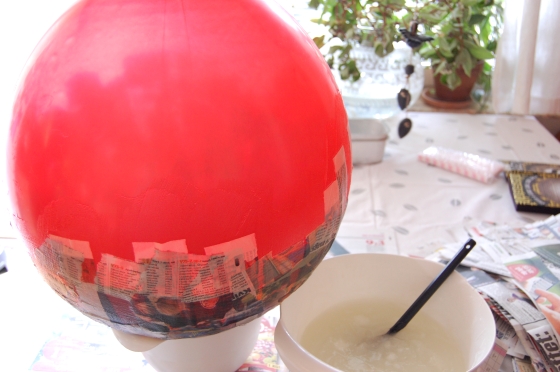
For this craft I had some boyfriend assistant, mostly because the balloon was so big it’s hard to handle it alone but also because it’s fun to do something crafty together. He help me blow the balloon (yes, I find them scary and always think they will blow up in my face…) to gigantic size!

pinata

pinata2

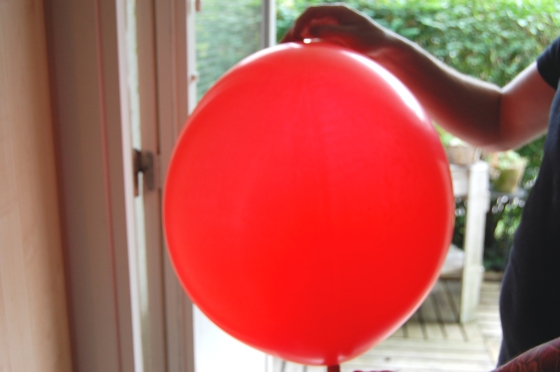
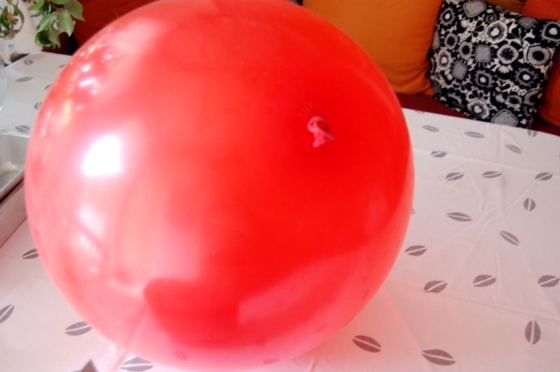
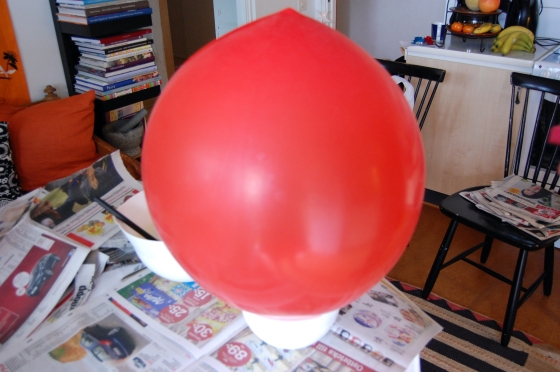
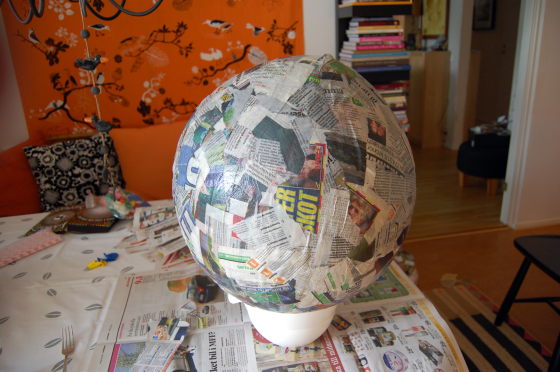
Although a bit scary, one can’t deny that balloons are very pretty! When the balloon was ready we placed it in a bowl, so it would stay still (mot of the time) when we put the paper and glue on. Choose a bowl you’re not all to fond of, it could get ruined or miss colored from all the glue. Also prepare with paper under the balloon, you don’t want to stain your working space. The glue washes away really easy with water though, but one can’t be too sure.

pinata5

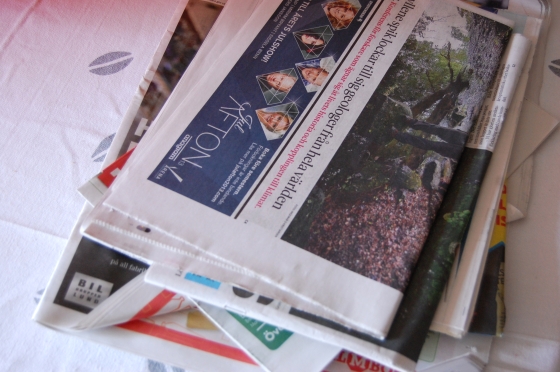
I used store-bought papier maché glue, I recommend it very much, it get’s much sturdier than the one you can make yourself. But if you want to try that I mentioned a recipe in this post . Mix you glue together and let it set for a while (the kind I used said ten minuets), while you wait you shred the papers.

pinata4

pinata6

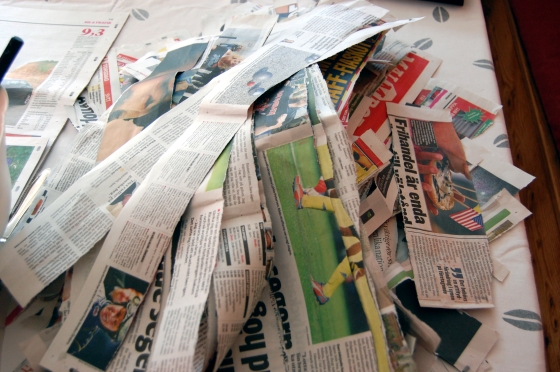
Now it’s time to start covering up the balloon! We used sponges to put on the glue and then lay some of the paper on and smooth it out.

pinata7

pinata8

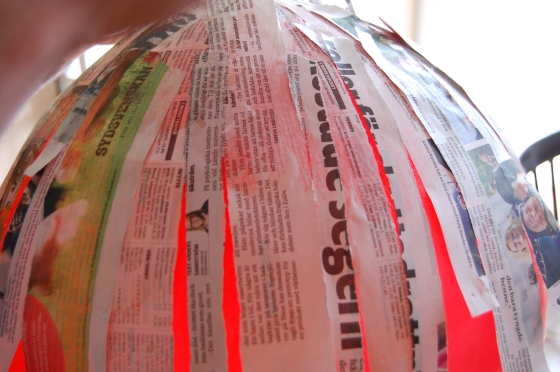
You do one layer at the time, so switch the balloon over when one half is covered! I did two layers at one time and them put it to dry for a day or two just to repeat it. Make sure you leave the top of the balloon (the knot) bare, this is where you get the balloon out later when the pinata is dry. All in all I had eight layers on mine. It’s important that you turn it over while it’s drying, or else the part in the bowl won’t dry but stay moist instead. So turn it around once a day if possible.

Make sure you keep the glue, cover it with some plastic, you’ll be needing it after filling the pinata.

pinata10

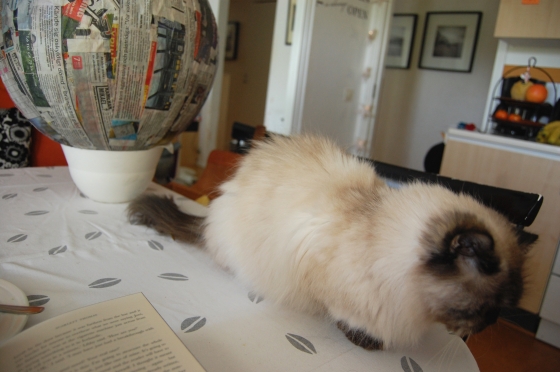
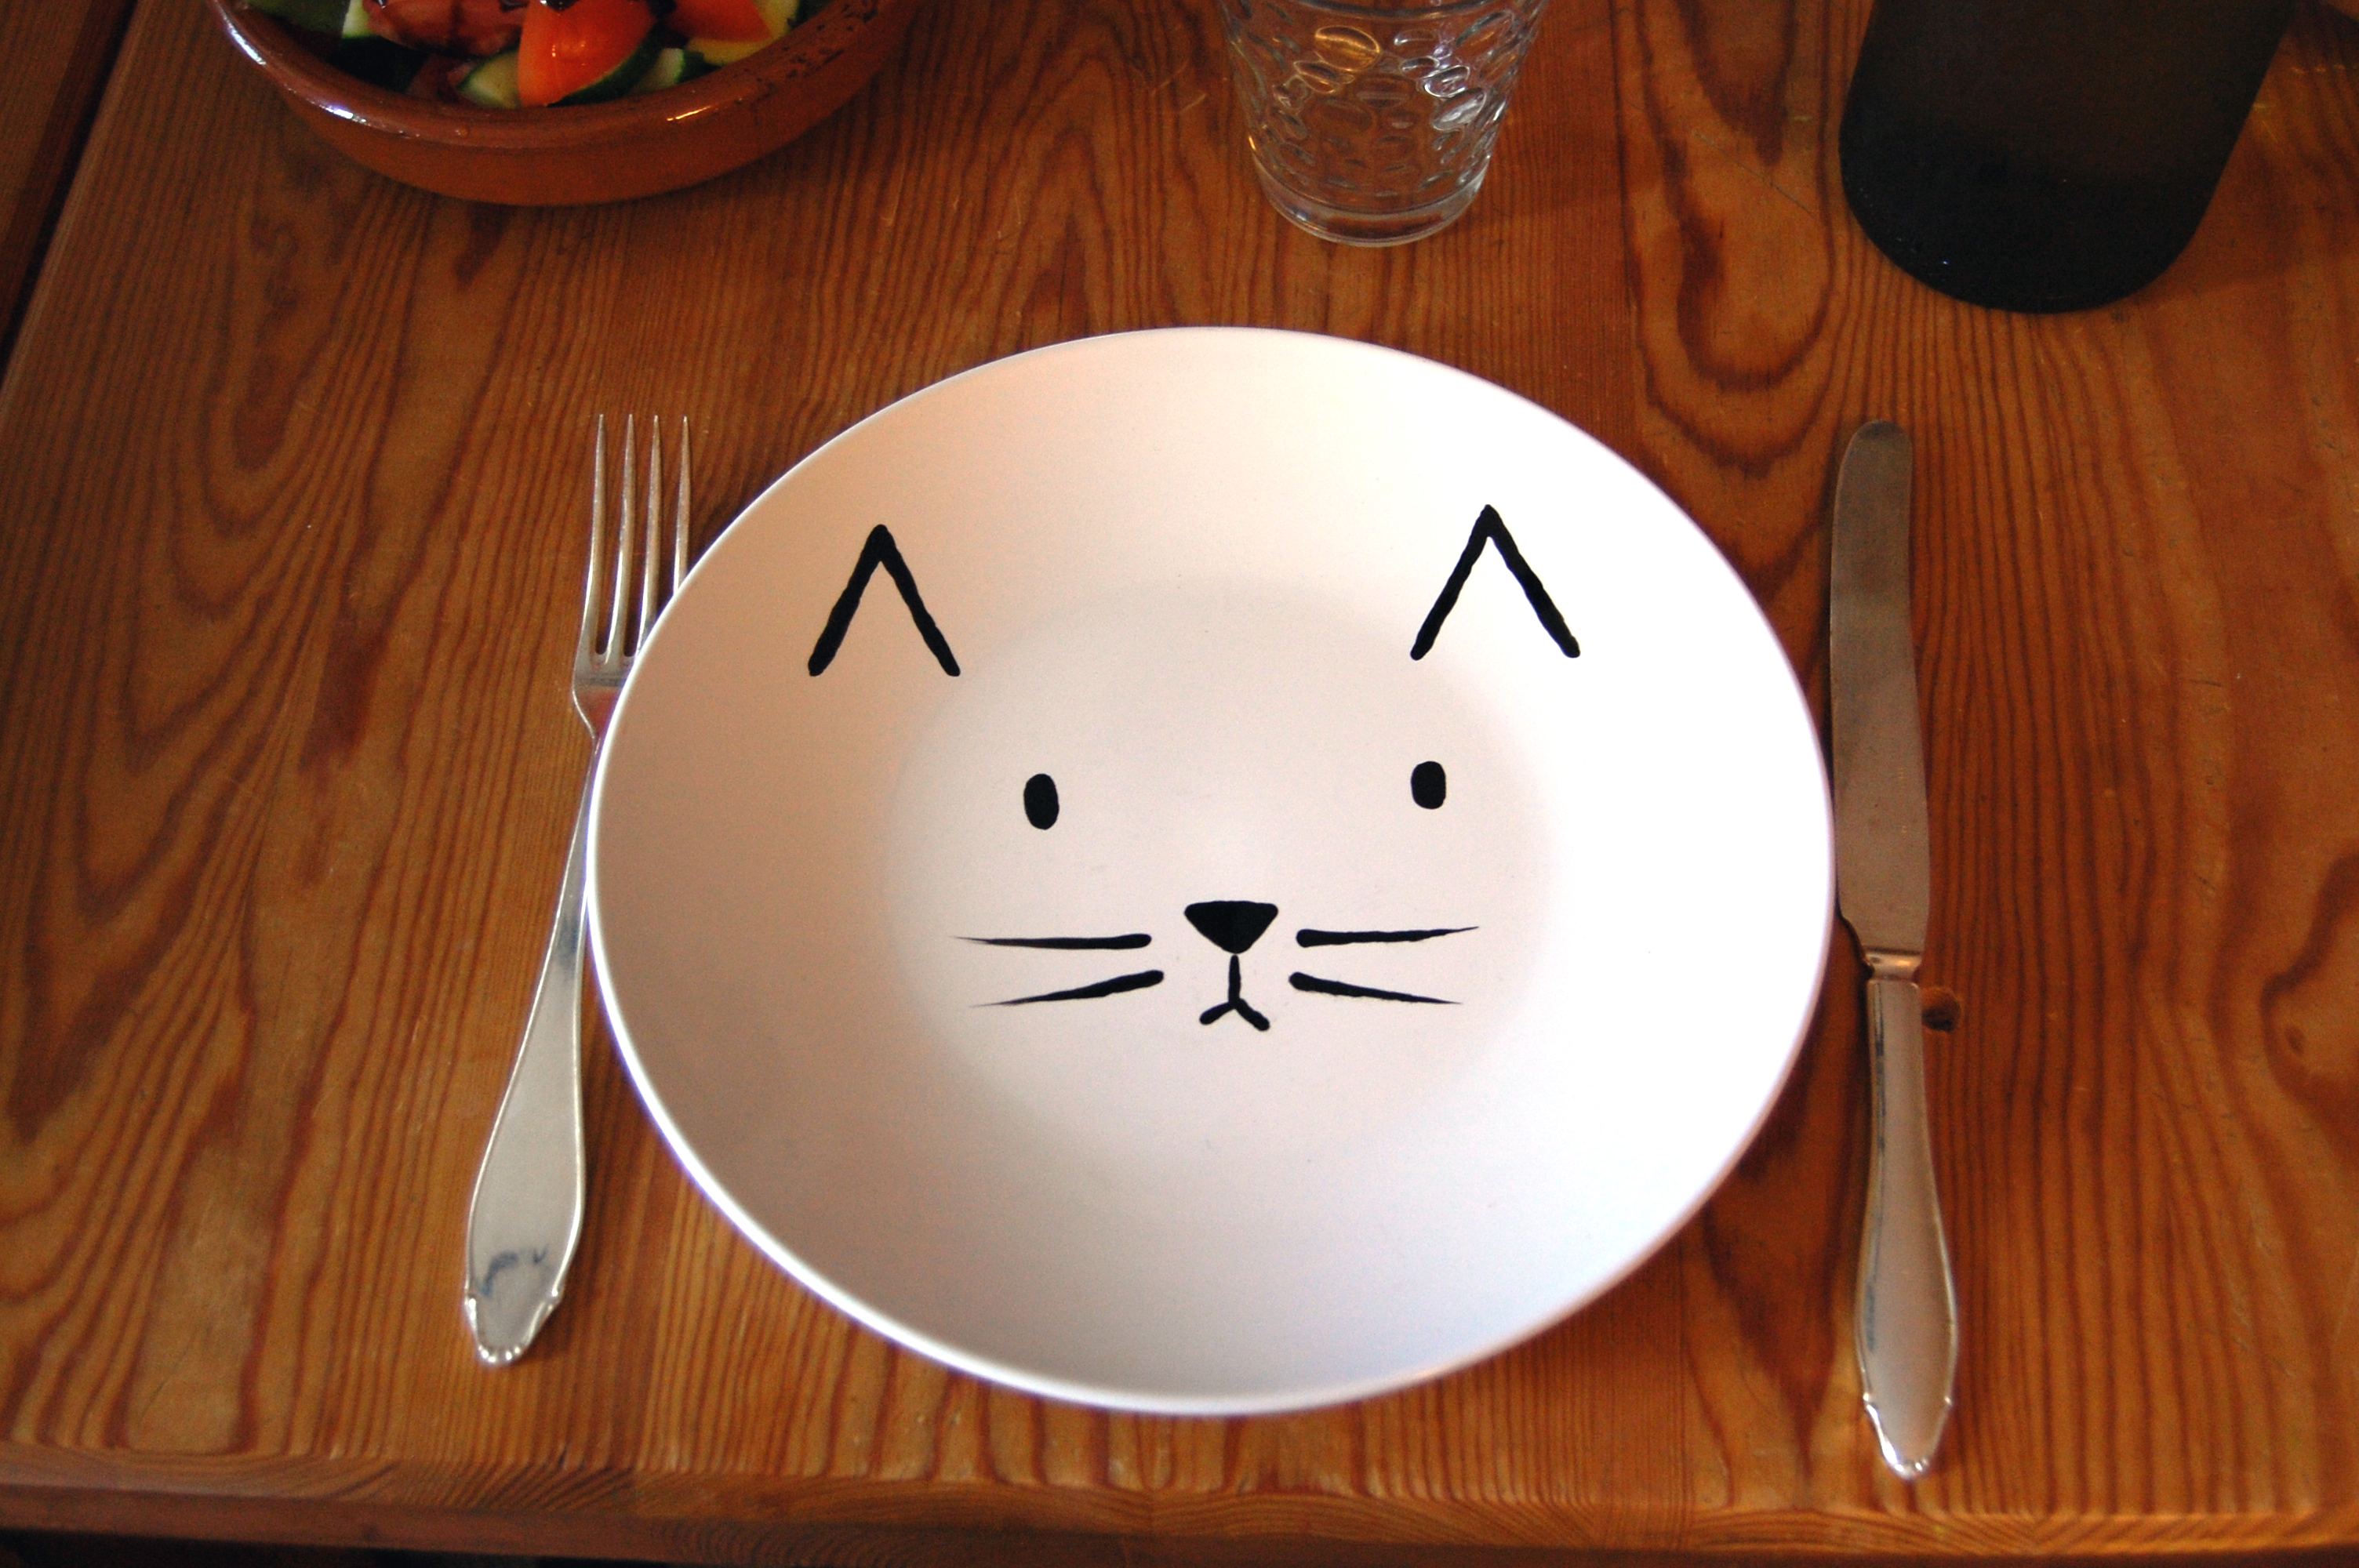
While it was drying my cat guarded it.

pinata9

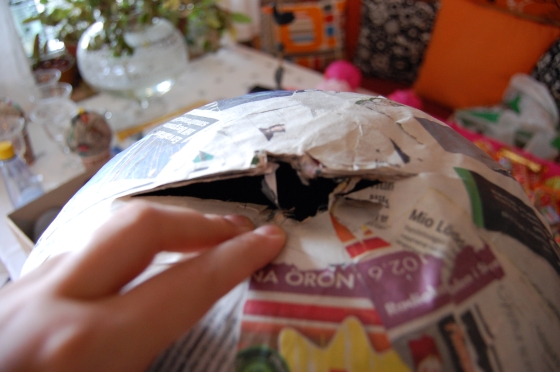
Skipping forward to when the pinata is dry you should fill it up. First though you have to remove the balloon, cut it at the knot and then pull it out. Cut the existing hole bigger, so the candy will fit!

pinata19

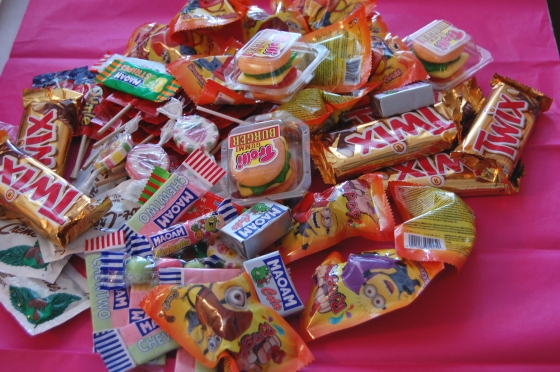
What I initially wanted to fill mine with was miniature booze bottles, but I hadn’t any luck in finding any and of course my fallback was candy. Since all of my guests grew up in the nineties I choose to put in ring pops, I used to love them when I was little (eatable jewelry is the best).

pinata18

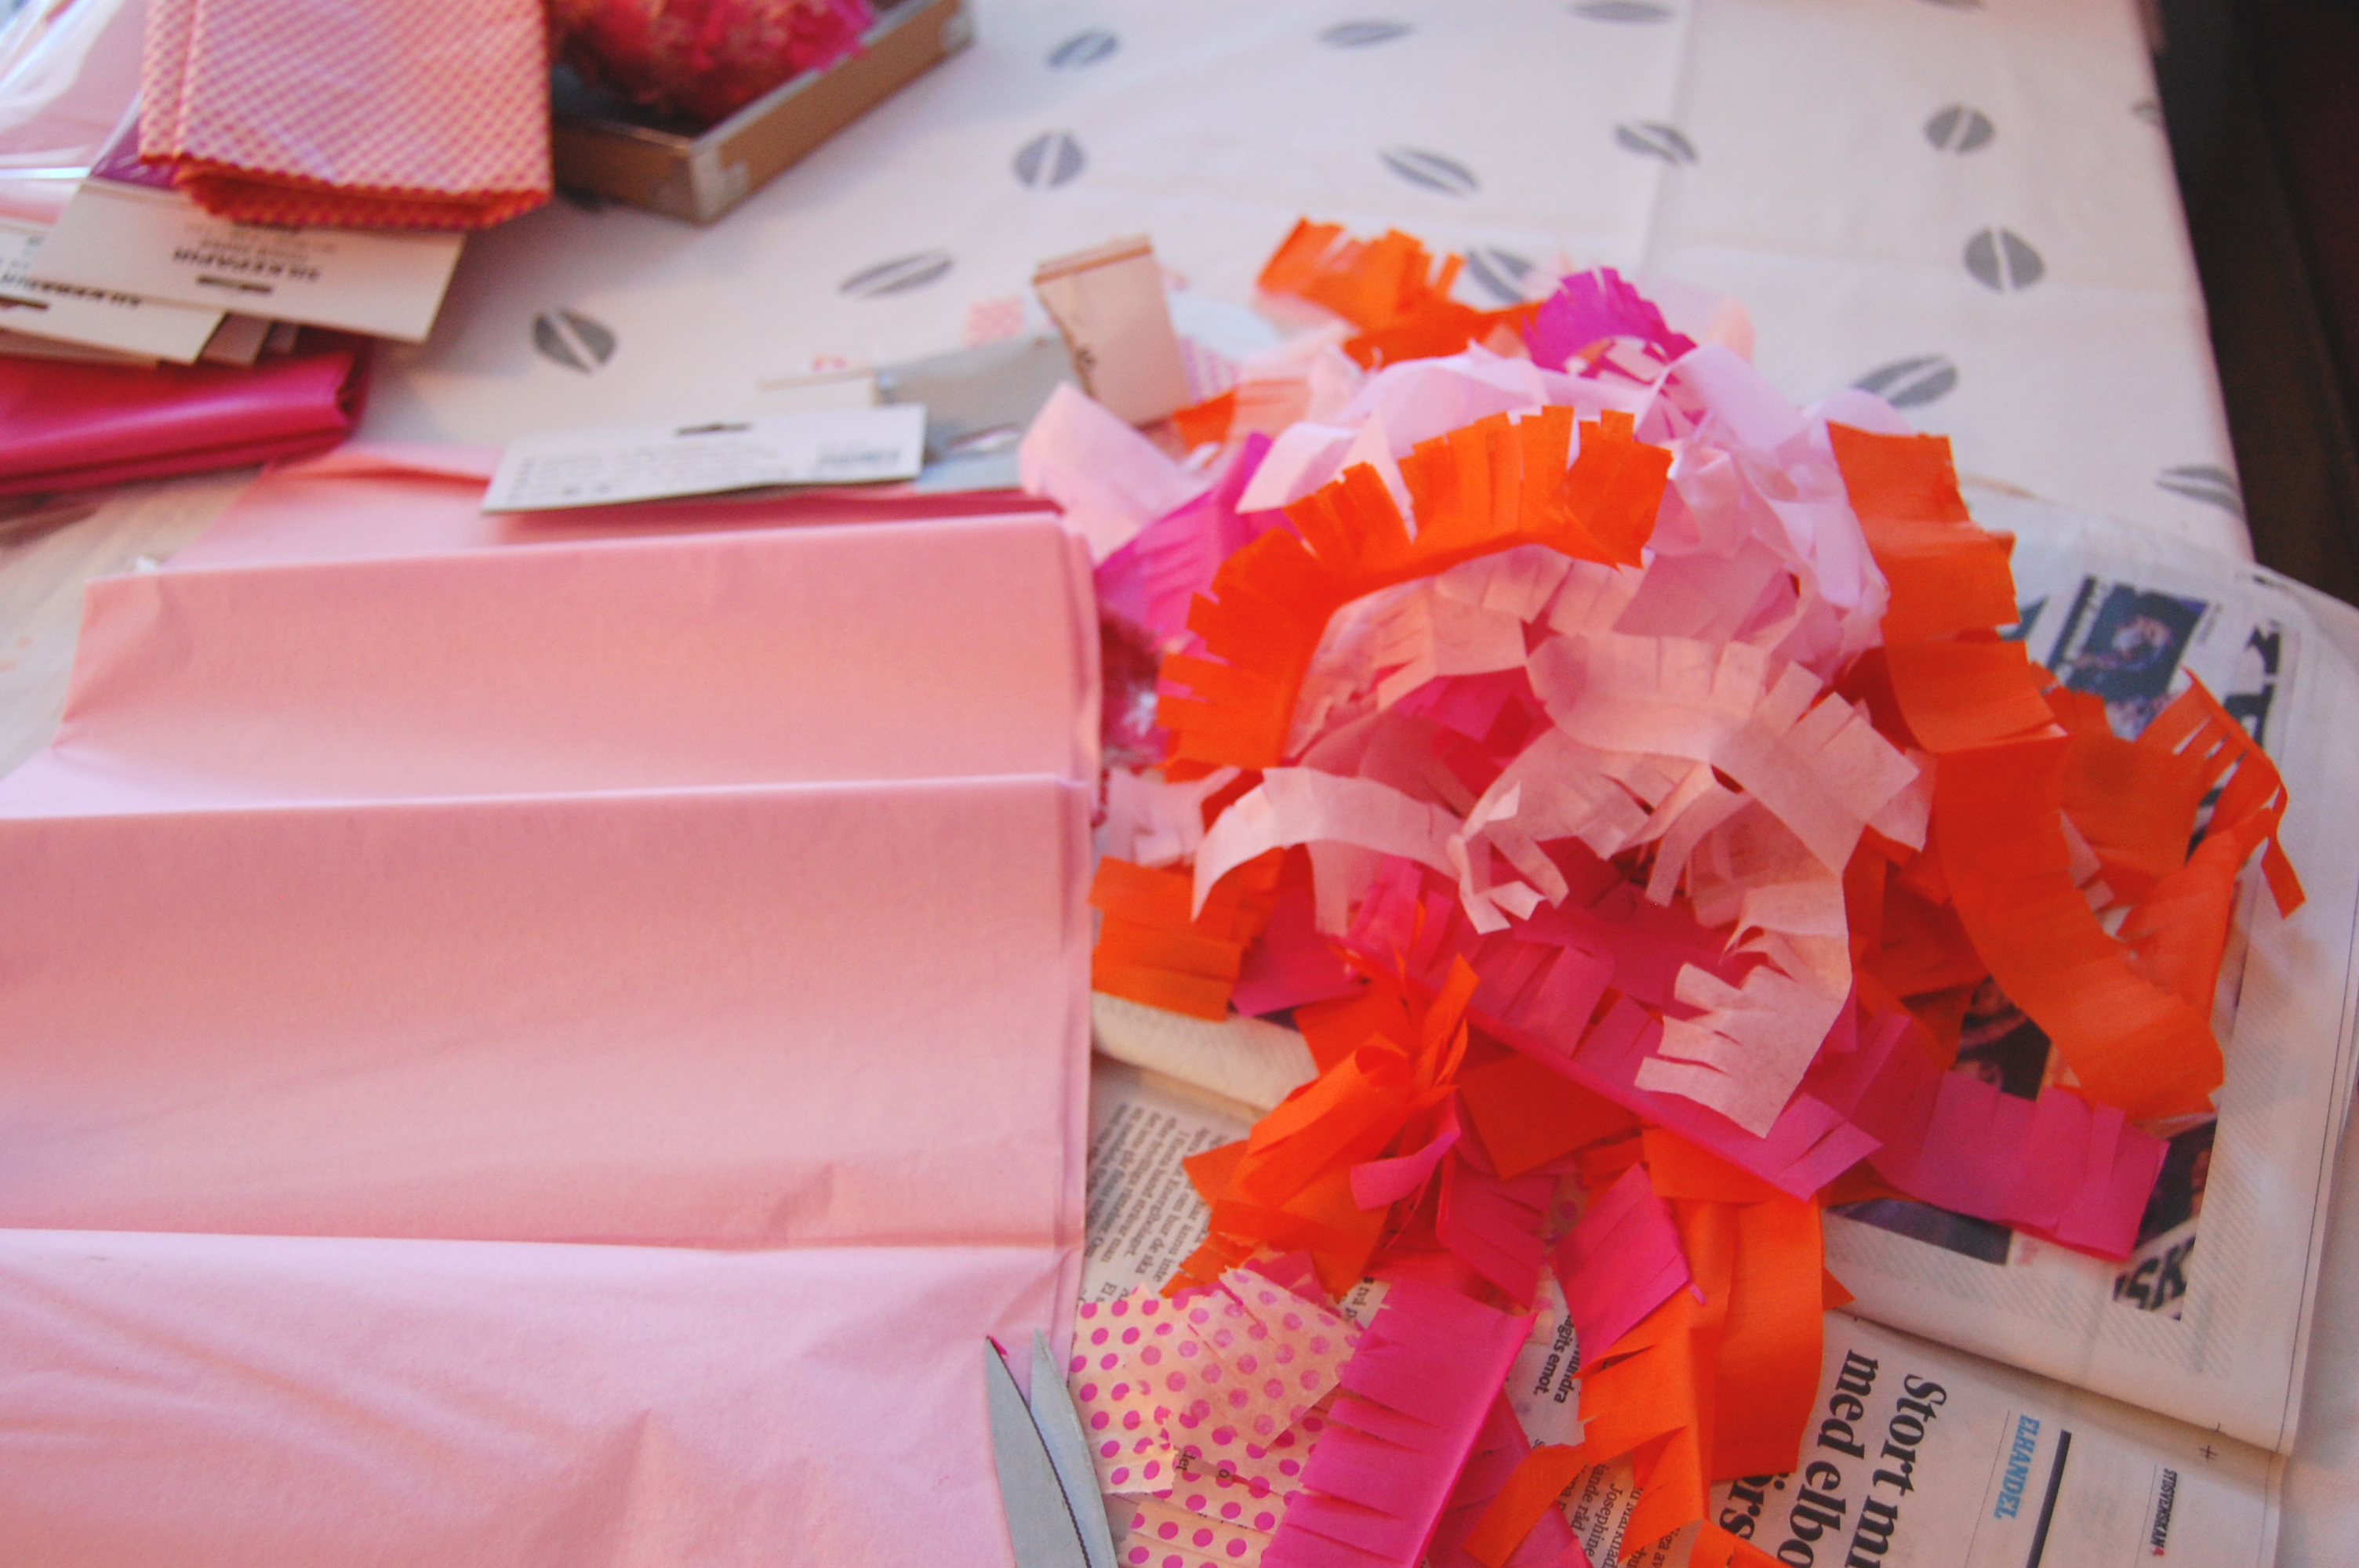
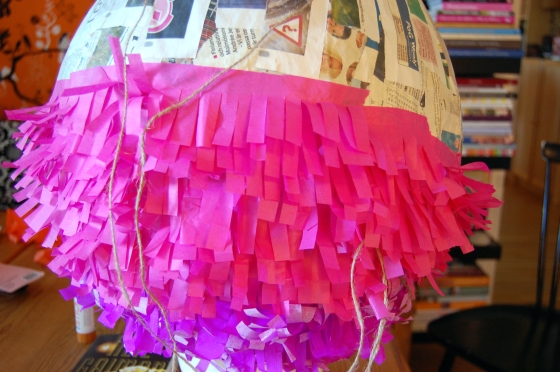
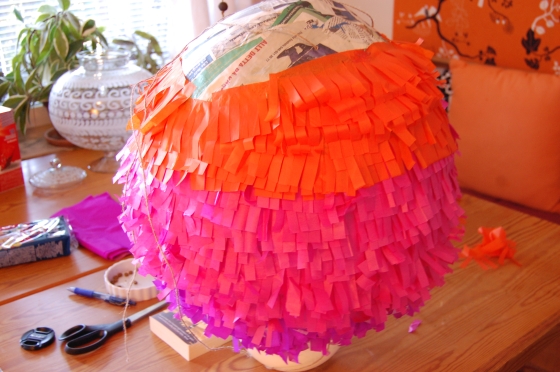
Put all the goodies in there and use needle and string to make to holes and tie the string through to hang the pinata in later. Then take the papier maché glue and some more paper and cover up the hole. The pinata will probably need one more day to dry before being decorated. When it came to the decor I choose three colors of silk paper, orange, pink and hot pink to create a cute ombre effect.

pinata14

For glue I had glue sticks, I needed three so stock up! Glue sticks are better than liquid paper glue, it’s easier to work with in this case. Start glueing them on at the bottom so the fringe will be pointing down.

pinata12

pinata13

I love how it really looks like a gigantic version of the mini pinatas I made as placement cards for the party.

pinata15

Have a good time smashing up your pinata beauty!

0

pink beetroot hummus

So I had this party last saturday and I made some really good vegetarian dishes. I paired them with to kinds of sauce, both served cold and made the day before. This one I’m really exited to show you, mostly because it’s delicious but also because it’s hot pink. I love that color, it adds a very nice touch to your plate. Perfect to serve with salad, roasted veggies or simply as a dip. Did I mention it’s really easy and impressive at the same time?

This is what you’ll need

  • One drained can chickpeas
  • 3 roasted beetroots
  • 2 cloves garlic
  • lemon juice
  • 3/4 cup olive oil (1,8 dl)
  • 3 tbsp tahini
  • salt & pepper

First off you’ll need to roast your beetroots, I bought some that already had been boiled so I could just slice them into wedges and put them in the oven with some olive oil and salt. They need 200 degrees celsius and 15 minuets.

beetroot

While they’re in the oven rinse your chickpeas and pour them into a bowl. Chop the garlic and add it to the bowl. Squeeze in some lemon juice (preferably fresh) and pour in the oil. Add the tahini, which is a sesame paste that you add for genuine hummus taste. When you’re done you mix it, I used my immersion blender but a mixer would work just as well.

Take the beetroots out of the oven and let them cool for a bit. When they’re not super hot you mix them with the hummus as well. It will turn a gorgeous pink and the beetroots will give the hummus a sweeter taste.

beetroot2

And it’s done! It’s a very good sandwich spread as well, I made vegan rolls with soy beans and baby spinach. A very tasty sandwich roll for all you vegans out there!

beetroot3

beetroot4

This is what it looked like when I served it at the dinner party. I would say it was a total hit! If you have a version of this recipe I would love to hear it!

Also I want to mention that I finished the knock off asos dress that I mentioned in my very first post. Photos and tutorial coming soon. So exited to show it, I’m so pleased! xo Pella

1

lime mojito jello shots (vegan)

I made these little bad boys for my birthday party, I served them with the welcome drinks (which I sadly did not get on picture, they disappeared too fast!). These are simple jello shots but served in a really cute way. Truth be told I only made these because I like the way of serving them in the lime slices, but they tasted better than expected. Not sure I am over thrilled by the jello texture though!
limeshot7

They are easy to make and I love things you can make ahead! I made these the evening before the party, but you could make them two-three days earlier, at least, just keep them in the refrigerator.

You’ll need 

  • 12 limes
  • Dr Oetkers Vege-Gel
  • Food Coloring
  • Mojito essence
  • White rum
  • Water

You could easily leave the rum out and just use more water, then you’ll have cute kid-friendly treats with fresh lime taste! Would probably be a total hit!

limeshotLook I evan managed to match my knife withe the limes, yay!

If you’d like you could make these with jello mixture and just follow the instructions on the package but I’m not a big fan of gelatin so I use the vegetarian substitute.

First of all you have to handle the hard part and that is hollowing the limes. For this I used a melon baller and a small sharp knife. I used the knife to try to cut loose as much as possible and them i scraped the rest out with the melon baller. Remember to not cut the limes in to wedges yet, that’s for when they are filled and the jello has set!

limeshot2

The inside of the limes will probably not look perfect, just as long as they are hollow it will be fine.

It’s time for the jello to be mixed. I mixed mine according to the package of my vege-gel. I boiled one and a half cup of water and added one sachet of vege-gel mix. Then I whisked it and let i cool a bit before adding the mojito essence (just a tablespoon or two). All of this will have to be done quite quick so the mix will be smooth. The last thing I added was the white rum, half a cup.

limeshot4

I placed my lime shells in a plastic container, so that they will not tip over, and start pouring the jello into the shells. Put them in the refrigerator for at least three hours and then they can be cut into the cute wedges. Each lime makes for four wedges when finished.

limeshot5

So there it was, a great make ahead party treat for grown up!

0

easy to make, cat plate


I’m a sucker for anything with animals on it, we’re talking clothes, furniture (especially lamps!), iphone covers and over all nick nacks, but fondest might be plates. I collect them, I love to mix and match different plates al long as they are close to size! But since I fall in love with different plates in mostly every thrift shop I ever step in to I have to set up boundaries. The number one rule for my Odd Plate Collection is this: It hat to be an animal on it. And that is definitely harder to find then you think! I have a small collection already but I had not yet found a good cat plate. Since that was a big fall out in the collection it had to be fixed quickly. I decided to make my own.

catplate3


catplate5This is the best craft for when you want to make a personal gift or only want to be creative for a hour or so. A really good one-afternoon-craft really. I bought a plain white plate at a thrift shop, they cost almost nothing, and I already had some porcelain paint and brushes at hand. Porcelain paint can be bought at any craft shop, it’s not that expensive, especially if you only pick one color as I have done in this example. They also last long and most of the paints can also be used on glass.

catplate

What you do is that you paint on your cat face, I choose to just make the nose, eyes, whiskers and ears. It’s easy and is a good thing to make with kids, inexpensive and rewarding. A good thing with porcelain painting is that you can just take some damp paper and wipe away any mistakes if your not satisfied with the outcome of one of the ears or something like that.

When you’re done with the painting you follow the instructions for the porcelain paint. It’s mostly baking the plate for half an hour and then letting it cool before use. I’ve already used mine three times, it’s my new favorite plate. I just might have to make a matching dog or something!

catplate4


9

DIY mini piñatas

Hi! Since my birthday’s coming up next week, and I’m throwing my birthday party this very weekend, I’ve been swamped with DIY projects! This project took a week to complete but look at the result!

mini7 These little mini pinatas will be the placing arrangement for the party so except from being all cute and colorful they actually have a purpose! And inside (for the guest that dares breaking theirs, which really is the point!) is a small candy favor each! Fun! Can also add that this could easily be done for kinds, but I don’t mind making these for my adult friends, who doesn’t like colorful things and candy, right?

This is how you make them! It’s not tricky at all, it just takes time to let the papier maché to dry, I therefore recommend you starting a week, or at least five days, before they are going to be needed.

You’ll need 

  • balloons
  • newspapers papers, shredded
  • papier maché glue
  • drinking cups
  • glue (for the decoration)
  • silk papers (also for decoration)
  • string
  • cardboard tags
  • candy!

I choose to use normal size balloons but decided to keep them on the smaller side so they later on can fit on a plate!

minipinata

mini2

I made twelve balloons, one for each guest and one for myself (it’s my party so I totally need one too). When i was finished with the balloons I mixed my glue, I choose store-bought since it won’t dry as fast in the bowl and can be used days later. I did this because I’m also making a LARGE pinata for my party, tutorial will be coming later! But if you only need the glue for this one project you could mix it yourself with 2 cups of flour and 2 cups of water and 1 tbsp salt, boil it on low heat in a thick pot.

DSC_0116

DSC_0189

I place the balloons in these cups so they will be easier to work with. Then I start layering on the shredded newspapers and the glue. I did not let the balloons dry between each layer, but you could for shorter drying time! I smacked four layers on there right away and let them dry for a couple of days instead, I’m not known for my patience really. Also don’t forget to leave the little knot on the balloon visible and uncovered, you’ll be taking out the balloon in that end later.

DSC_0191

When you put the papier maché on the balloons will start to feel very unsteady but that’s what’s suppose to happen. Just keep them in the cups and turn them around once a day so every part of the balloon can air dry.

DSC_0224

Let’s fast forward to when they are dry! They feel very solid and you can easily cut the balloon out now, be careful so you don’t get it stuck inside, although if that happens it’s not a disaster. Once the balloon is out it’s time for putting in the candy, in mine I had to cut a bigger hole, but it’s glued together again afterwards so it doesn’t matter.

mini6

Now it’s time to fill them! I choose to just put in a few pieces, mostly because I’m also having the large pinata but also because it’s right before dinner and I want my guests to be able to enjoy the food. When you have filled them with your candy of choice you take the glue out again (I stored mine in the kitchen with just some plastic over, it stays moist for about a week). Here I put a little piece of string in before glueing them together again.This is for me to hang the cardboard tag in for later, it’s how I turn these little things into placing cards. Let them dry in the cups again, just like before and when dry it’s time to decorate them.

mini12

mini13

I am not a fan of crepe paper so I choose silk paper instead. I got hold of some really nice colors, orange is my favorite and the one with the small dots of course. I suggest you fold the papers so you easily can cut out small strings with fringe. This is a bit time-consuming if you don’t fold the papers before cutting! I made a really big pile with all the colors I was going to use (all of them). And then i glued them on starting at the bottom, the part without the string sticking out. It doesn’t really matter what kind of glue you use, pick what you have home already. I had simple glue sticks which works really well with the thin silk paper.

mini8

mini10

mini11

This is how they turned out! I am rally pleased, and I sure they will be a hit at the party. It’s also a rather nice craft, it’s so rewarding to see the outcome. The mini pinatas are adorable and could be used in so many ways. I am already thinking about this as a gift wrap idea. And you could make them like eggs for easter. The variations are endless. I am sure you’ll have a blast making them!

mini9